


![]()
一款適用於 Windows Ink 的智慧型觸控筆,可書寫、做筆記和進行註解。只要 4 個簡單步驟,輕鬆設定你的 Bamboo Ink。或者直接點擊此處觀看示範影片。


以下為如何設定 Bamboo Ink,並開始在 Windows Ink(Windows 10 裝置上可快速簡便支援數位筆的功能)環境中使用 Bamboo Ink 的逐步操作簡易指南。
![]()
一款適用於 Windows Ink 的智慧型觸控筆,可書寫、做筆記和進行註解。只要 4 個簡單步驟,輕鬆設定你的 Bamboo Ink。或者直接點擊此處觀看示範影片。

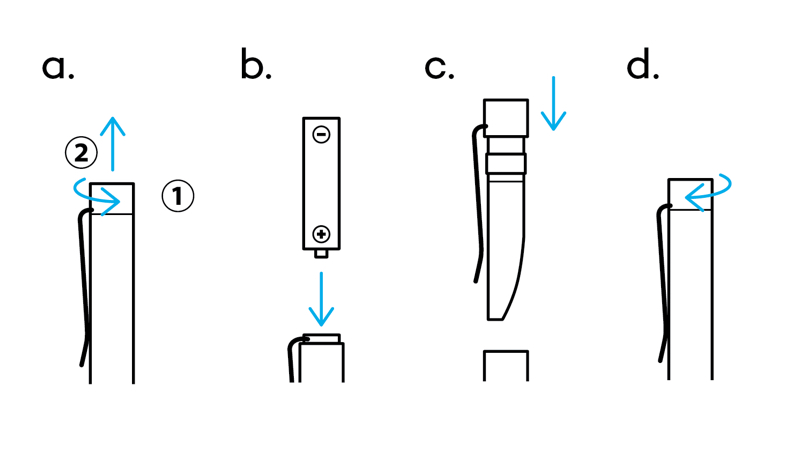
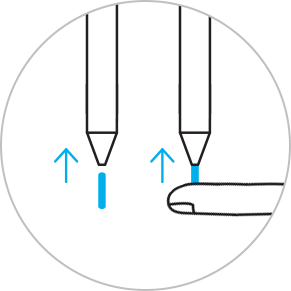
擰轉 Bamboo Ink 頂端並將其鬆開。按照指示打開並放入電池,然後閉合並將頂端轉緊,以便固定。
請確定放入電池時讓電池的「-」端朝上。

如欲檢查 Windows 裝置是否與 Bamboo Ink 相容,請查閱本頁所列出的經測試裝置清單。
某些裝置需要更新驅動程式。如欲確認你的裝置是否在此列之中,請見下列清單。 若你的裝置未在清單內,請繼續進行第 2 步。 若你的裝置在此清單內,請點擊此處下載「Bamboo Ink 觸控筆」驅動程式。將下載的檔案儲存在你的裝置上,然後雙擊該檔案以安裝驅動程式。請按螢幕指示進行操作。
擰轉 Bamboo Ink 頂端並將其鬆開。按照指示打開並放入電池,然後閉合並將頂端轉緊,以便固定。
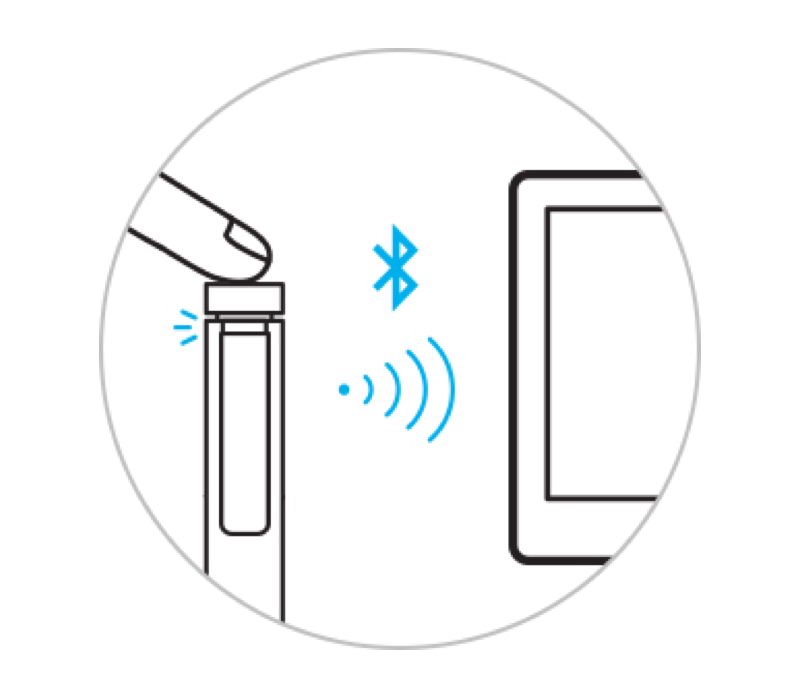
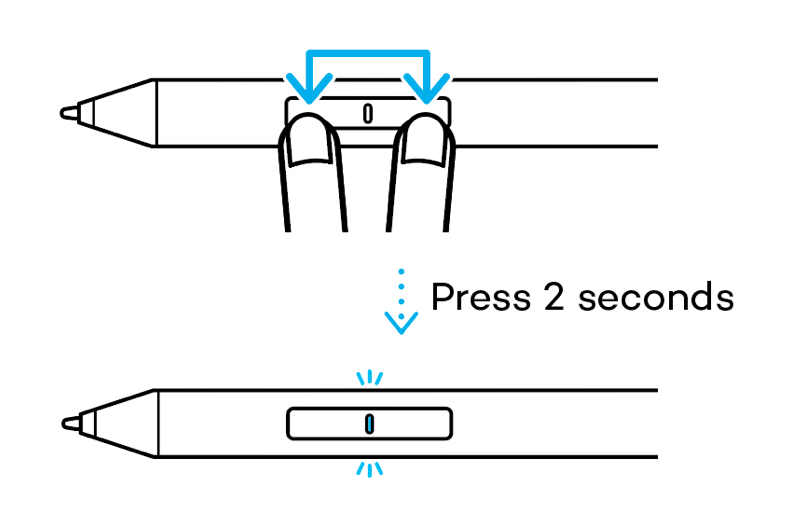
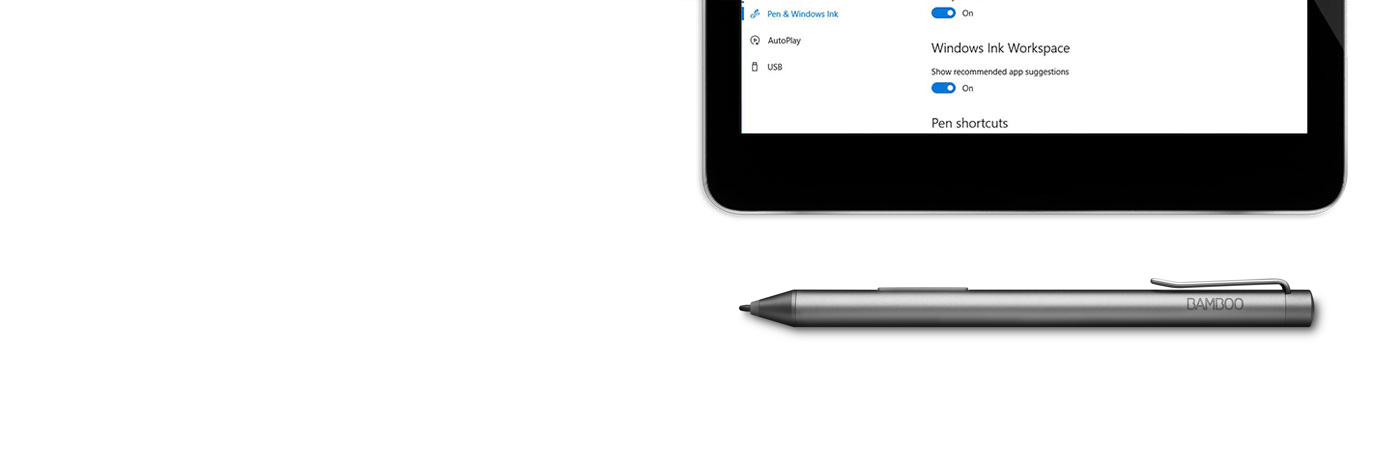
1. 在 Windows 10 桌面上點擊「開始」選單,選擇「設定」,選擇「裝置」,選定藍牙並開啟。
2. 現在拿起 Bamboo Ink,長按頂部按鍵六秒鐘 — 直至 LED 燈開始閃爍為止。
3. 從已發現的裝置清單中選擇 Bamboo Ink,然後選擇配對。
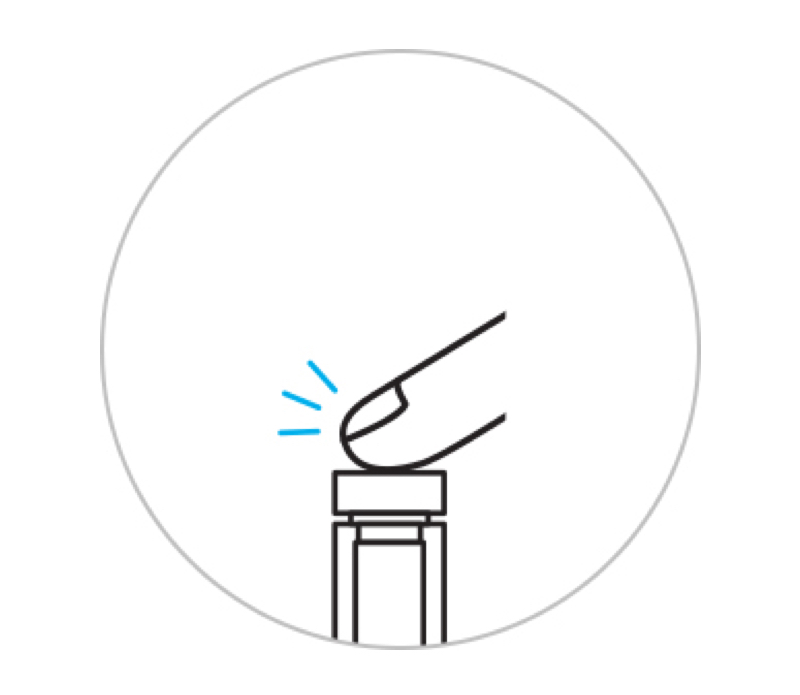
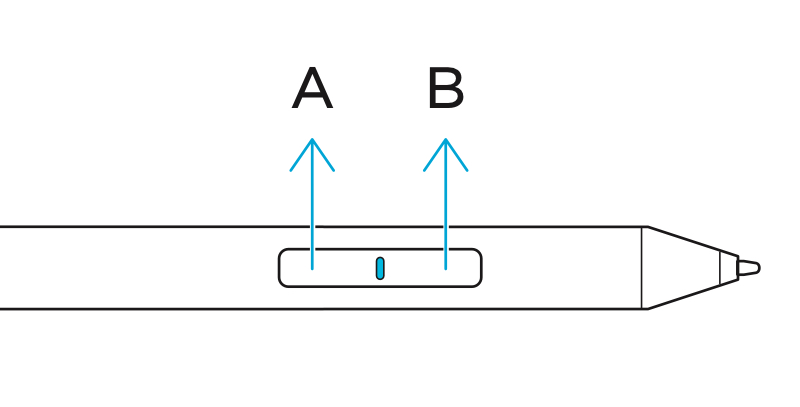
按下頂部按鍵以快速啟動 Windows Ink Workspace。
雙擊頂部按鍵開啟螢幕素描功能。
按下並長按頂部按鍵開啟便利貼功能。
請在方便時更改預設設定。請至「開始」選單處選擇「設定」,然後選擇「裝置」並在「觸控筆和 Windows Ink」中客制你的 Bamboo Ink 的功能。

配件(另售):筆尖套組 — 柔軟、標準與硬筆尖,選擇最適合你工作方式的工具。
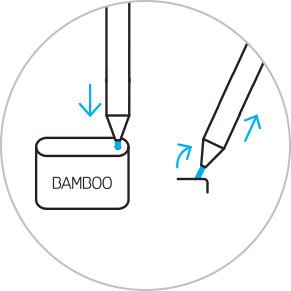
如欲更換目前所使用的筆尖,只需將其插入筆尖套組的內建式筆尖拔除器小孔內。斜置觸控筆並拔除筆尖。
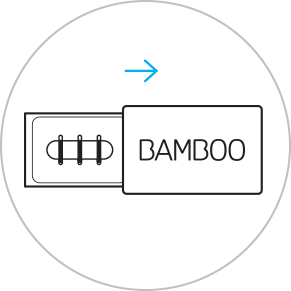
滑動以打開筆尖套組,由左至右的筆尖選擇為:硬(黑色)、標準(灰色)或柔軟(黑色)。
輕壓以裝入你所選擇的筆尖。確保筆尖固定妥當。
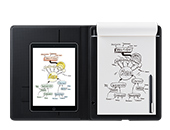
便箋、草圖板、螢幕草圖:Windows Ink工作區與三個預裝應用程式幫助您透過Bamboo Ink開始您的創意。
Bamboo Paper讓您的裝置變成紙質筆記本。捕捉思想和創意,筆記、素描和繪畫就像在真正紙質筆記本上一樣直接和輕鬆。
便利貼、素描板、螢幕素描功能:Windows Ink Workspace 隨附三款預載應用程式,幫助你透過 Bamboo Ink 在動靜之間奠定你的創意。
Bamboo Paper 會將你的裝置轉化為書寫用筆記本。將你的奇思妙想記錄下來,如同在真的紙本筆記本上做筆記、速寫和繪圖般直接與輕鬆。
将 70% 或 75% 含量的异丙醇(外用酒精)倒在柔软的无绒布上可以安全地清洁所有 Wacom 产品。 用微湿的布轻轻擦拭 Wacom 产品坚固、无开孔表面(如数位屏外屏)或其他外部表面。 切勿使用漂白剂。 避免在任何开口处弄湿,亦勿将 Wacom 产品浸入任何清洁剂中。 有关其他提示,请参阅下面的内容,或联系您当地的Wacom 客服团队。
用於Bamboo Ink的筆尖組,包括3種不同筆尖類型--軟、中度和硬--提供個性化、真實螢幕感覺,以適應您的個人書寫風格。